Friday, April 9, 2010

Sponge painting

Super easy, and super quick! This is another one of those "fall back" ideas that can fill up five minutes... or an hour! :)


You will need:
  • Sponges, of course! If you have fun shapes, use them! If not, any old sponge will do... or cut up a sponge you are done with and make your own shapes!
  • Paper
  • Washable paint
  • Paper plate

I like to use paper plates for paint trays because the clean up is so easy! Dab the sponge in your paint and then onto the paper.


Not a whole lot of explanation needed on this one! :)


We did primary colors in various shapes.


We also did a bit of color mixing at the end.


My daughter decided on her own to "count" her shapes and tell me about each of them. Besides counting, we talked about their shapes and their colors.


Another bonus... it dries fairly quickly!

Thursday, April 8, 2010

Do-a-Dot Art!

Okay, this probably falls under the category of "Things Everyone Else in the Entire Universe Has Been Doing for Years," but I've just recently discovered Do-a-Dot paints, and I am in LOVE! I know I mentioned them once before, but since my girl just received hers over the weekend in her Easter basket, we are just now trying them out.

What I LOVE about these paints is that... they are so clean. I can actually let my two-year-old paint WITHOUT fearing that I'll end up spending her whole naptime cleaning up the aftermath. The whole "dot art" thing is so fun, but from a mom's perspective, I am seriously loving how low-maintenance these things are!


You will need:
  • Do-a-Dot paints {Note: You can buy these online - see link above - but I purchased our set from Michael's and used one of their regular 40% off coupons. It was a bit cheaper doing it this way... about $10.}
  • Any dot art printable or coloring page {Note: There are a hundred million places online to print dot art for FREE... don't feel like you have to buy the special coloring books unless you want to. One of my favorite blogs actually has a ton of educational printables that go with Do-a-Dot paints.}
  • Construction paper or cardstock
  • Scissors and glue... which I forgot to put in the picture :)

We started with green for the leaves of our tulip.


At two, she doesn't necessarily stay in the "dots," but who cares? She's having fun! :)


She chose purple for the flower.


When it dries, cut out your shape and glue to the construction paper. Lovely spring artwork!

This activity gets two thumbs up... from mom and toddler! :)

Wednesday, April 7, 2010

Weekly Read Wednesday: "Dumpy La Rue"


Dumpy La Rue by Elizabeth Winthrop might have a familiar look. It's illustrated by Betsy Lewin, the illustrator behind the Click, Clack, Moo books (which are some of my favorites!).


Dumpy La Rue is a little pig who wants nothing more than to dance. He doesn't care about rolling in the mud or eating food like the rest of the pigs... he wants to spin and twirl around the barnyard!


He doesn't care who comes to watch him. He has a song in his heart and isn't bothered by being "different." He isn't discouraged when his family doesn't understand him... he just keeps doing what he was meant to do!


Pretty soon, the rest of the farm animals follow suit, and realize what fun it is to dance!


I love the illustrations in this book because they're so similar to the Click, Clack, Moo books, but I also love the message of this story! Perseverance, individuality, and self-confidence are all themes of this book!

Monday, April 5, 2010

Cookie cutter designs

Happy Monday! I hope everyone had a lovely Easter and enjoyed nice weather for it! My daughter got WAY too much... it's good to be the only grandchild on both sides of the family. :)

We took advantage of the warm weather to do this activity, but if you don't mind sweeping up the excess, it could easily be a rainy day craft.


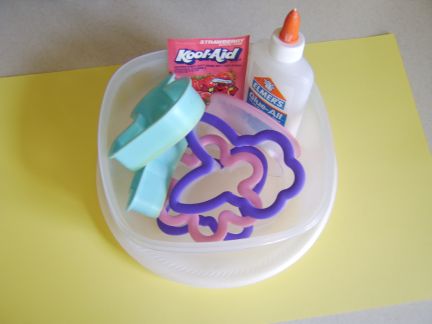
You will need:
  • Paper (we used a large piece of cardstock)
  • Glue
  • A disposable plate
  • Cookie cutters in any shape (we used spring shapes... bunnies, ducks, flowers, etc.)
  • A packet of Kool-Aid or any other colorful drink mix... or if you have colored sugar leftover from the holidays, this would be a great way to use some of it up!

It was a little breezy on this day, so I plopped some cans down on the corners of the paper to keep it from blowing away.


Squeeze glue out onto your plate. I like using foam plates because they're sturdy, but clean up is still super quick.


Have your child choose one cookie cutter at a time and dip it in the glue.


Stamp onto paper.


We chose to do all the glue first, but if you do this, you'll need to work quickly. It might be better to do a few shapes at a time so your glue doesn't dry out.


Sprinkle Kool-Aid or other colored powder onto your glue. Shake around, if necessary, to coat. Dump the excess. {Please note: Kool-Aid DOES stain hands! A couple good hand-washings and her regular evening bath fixed that issue, though.}


Let dry. Like I said, be careful that your glue doesn't dry before you get to the sprinkling part. We ended up with some funny looking half-shapes! :)

Saturday, April 3, 2010

Happy Easter weekend!


Happy day-before-Easter! We've mailed our cards, displayed some art projects, gobbled up our rolls, and dyed our eggs. We have big plans to attend our town's annual Easter egg hunt today, if we don't get rained out. The Easter baking is in full swing. I had a local shop embroider my daughter's name on her new Easter basket. And I'm still trying to pin down which dress she'll wear tomorrow. I bought three.


And -- just in case the warning was needed -- please, when dying Easter eggs, don't let this happen to you.


But if it does... remember, bleach is your friend.

Happy Easter! And happy countertop cleaning! {Oh... just me?}

Friday, April 2, 2010

Resurrection rolls

I've heard about resurrection rolls for years, but never made them myself. My mother-in-law used to make these with her kids when they were little, and it was always one of those neat traditions I figured I'd do with my children someday. I decided that, even though my daughter is still too young to "get it," we'd go ahead and make these treats this year just for the fun of it. :)


You will need:
  • Marshmallows - all the recipes I've seen call for the large ones, but all we had were minis. We adapted the recipe by just using 3-4 mini marshmallows rather than one big one, and it worked just fine. (The marshmallow[s] represents Jesus' body.)
  • Melted butter (represents the oil they used to anoint His body)
  • "Spices" - we used a mixture of white sugar, brown sugar, and cinnamon (represents the spices they used on His body)
  • Packaged crescent rolls (represents the linen that was used to wrap Jesus' body)
  • Cookie sheet and oven (represents the tomb)

Dip your marshmallows into the melted butter.


Then roll them around in the "spices." This was my daughter's favorite part. She could have done this all day.


Place your marshmallow(s) on a crescent dough triangle and roll up. Place on cookie sheet.


We made a little assembly line. I was amazed at how quiet this activity was. My girl loves to help me "cook," and she loves making delicious treats for us to "eat" in her little play kitchen. She'll beg me to stir whatever I'm preparing whenever she can. But I guess I didn't realize just how much she would LOVE to "cook" on her own! She was so focused on this... it was just so sweet to watch. :)


Pop them in the oven and bake according to the package.


They come out golden brown and oozing all that sugary goodness that's inside. :)


When they're cool, let your child open one up and try to find the marshmallow. It's gone, just like Jesus' body is gone from the tomb!

She remembered that there had been marshmallows inside, and she knew they weren't there anymore. I know she isn't yet at an age that she can understand the Easter story, but what a privilege to be able to teach my child these things... even from before she can remember!

Thursday, April 1, 2010

Easter egg science: loud and quiet

Science for two-year-olds? Well, sort of! :)


You will need:
  • Plastic Easter eggs
  • Various objects to hide inside
  • A container to hold them in

The objects you choose don't necessarily matter, but you're looking for things that will product a variety of sounds. As you see from the labels in the picture, we did:
  • Quarters
  • Pom-poms (which my daughter calls "puffies")
  • Dried beans
  • Play food (a strawberry)
  • Buttons
  • Yarn
  • Jelly beans
  • Bouncy ball
  • Kleenex
Some other ideas might include:
  • Marshmallows
  • M&M's or other small candies
  • Small rocks
  • Cotton balls
  • Q-tips
  • Leaves or blades of grass
  • Paper
  • Paper clips
  • A small votive candle or tea light (not in glass)
  • Raisins or other dried fruit
  • Sequins
  • Magnets
If you're working with a young child (as I am), it's of course always important to remember that small items are choking hazards. DO NOT leave your child unattended with this activity for any length of time.


Close all the eggs up and allow your child to inspect them.


Shake each one and discuss if it is "loud" or "quiet." Older children can use more descriptive words, such as "more quiet than," "louder than," "softer than," etc. They can also pick out eggs that have similar sounds to compare and contrast them.


Again, depending on the age of your child, see if they can guess what's inside!


At two, we didn't so much "guess" as much as we just opened them to check them all out! :)

She loved this activity! It's one that can take as much or as little time as they want it to take, and when they're done, they're done. :) If they don't get to all the eggs, who cares?

And how fun would this activity be if it were done with all foods?! What loud and quiet SNACKS can you put together? Baby carrots, bunny crackers, and lettuce leaves would all make a fun springy snack and produce different sounds. :)